SHELLY | 1 One Relay Switch Wireless WiFi Home Automation iOS Android Application – 1 Pack Non UL (1, Count)

(9 customer reviews)
SKU: B07G33LNDY Brand:
Operation  Electrical
Brand Shelly
Item Dimensions 1.61 x 1.42 x 0.67 inches
Mounting  Wall Mount
Connectivity  Wi-Fi

$17.32

Out of stock

  • Manoxo business standart

Our courier will deliver to the specified address

3-5 Days

Free

  • Manoxo express delivery

Our courier will deliver faster to the specified address

2-3 Days

Paid

  • Free 30-Day returns

Payment Methods:

Description


Product Description

Shelly 1 Device with certifications and apps

Control a wide range of home appliances and office equipment (lights, power lines, garage doors, curtains, security systems, heating, air conditioners, etc.) from anywhere with the tiny WiFi-operated relay switch- Shelly 1. With Shelly 1, you can automate your home in the easiest and most cost-effective way

Device with icons describing features
electronic parts of product

Wide range of voltage support

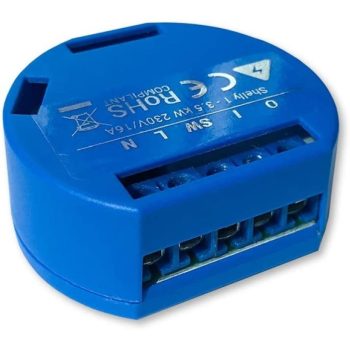
The UL-certified Shelly 1 can control one electrical circuit up to 3.5kW or 15 amps. No matter if your project requires 12 V DC, 110-230 V AC or 24-60 V DC, you simply set the correct voltage via the jumpers on your Shelly 1 and realize every Smart Home project. Additionally, Shelly 1 has an optional add-on for temperature, humidity, reed switch and other sensors. It is intended to be mounted inside a standard in-wall console, behind power sockets, light switches or other places with limited space.

Man using mobile app

Mobile app on tablet

Women using app on tablet

Lighting control

Make any light switch smart with Shelly 1. No need to get up during movie night or worry about forgotten lights on- just use your phone or your voice to switch them off! Switches can still be used manually to suit the needs of everyone in your home.

Garage door control

Make your own smart garage door opener with the Shelly 1! When leaving home, you can easily open and close your garage door without worrying that you may have left it open. Shelly 1 has operation voltages of 12V and 24-60V DC, as well as dry contacts, which allow for the control of most garage doors on the market.

Irrigation system

Automating your irrigation system allows you to set a schedule that is custom tuned to your yard’s needs! Connect your sprinklers to Shelly 1 and choose your preferred schedule or follow sunset/sunrise times. Your plants will always be well watered with no water wastage or expensive irrigation systems!

Compatibility and APP banner
Wiring Diagram

Customer Reviews

4.1
9 reviews
5
2
1
0
1

9 reviews for SHELLY | 1 One Relay Switch Wireless WiFi Home Automation iOS Android Application – 1 Pack Non UL (1, Count)

Clear filters
  1. Your review is awaiting approval

    Amazing product either with it’s own firmware (that supports mqtt) or with a very easy flash to tasmoto firmware you simply can’t go wrong. UL listing is all that’s missing but I hear that’s in the works so yeah.My wish list:- Please get the Shelly 2 back in stock @ Amazon … ASAP- Design/Release a Shelly 1 Dimmer- Design/Release a Shelly 2 Dimmer- Design/Release a 20A Shelly Switch since all of my garage circuits are 20AOkay I have more requests but those are the ones at the top of my list. 🙂

  2. Anonymous (verified owner)

    The Sonoff Basic with its low cost and ability to be reflashed with custom firmware has long been a favorite of the DIY home automators but now has some serious competition. Here’s why the Shelly 1 may be worth the extra price for certain applications:1. Tiny Size. I was able to fit it in an outlet box in my 1955 home, when the boxes weren’t near as large as new construction today. It even works in a metal box.2. Switch activation uses AC hot. This is perfect to use existing wall switch and wiring for manual control.3. Very customizable. While Sonoff now fills in the holes to solder a header pin, which adds another frustrating step to the reflashing process, Shelly adds an exposed female header should you wish to reflash your favorite firmware like Tasmota. Although honestly, I found their preloaded firmware just fine after updating it OTA to obtain MQTT capability.So will this replace the beloved Sonoff? It depends. For a robust relay you want to trigger with ex

  3. JustMe (verified owner)

    The Shelly One totally changes the prospect of true home automation. With the ability to be added into existing home wiring, to make regular circuits “smart”, The Shelly One is exactly the product I’ve been looking for for years. The wiring is a little funky, but totally doable for an average DIY homeowner. Just read the diagram carefully, and check out videos on YouTube about wiring the Shelly One.I have only one minor complaint, but it might really matter to some. If the Shelly turns a circuit off, and the switch was previously on, you’ll have to change the switch to the ” off” position, then back on again, to turn on the light. Not a big deal to me, but this may be a deal-breaker for some.

  4. Anonymous (verified owner)

    This is my second batch and will be ordering a third. Won’t be ordering any more Sonoff’s.Advantages:1) really, really small in size – easy to fit inside just about any switch junction box.2) 16A relay (vs 10 A in sonoff).3) Relay is isolated from power input so can use it to switch low voltage (like garage doors, thermostats, pool controls) while powering the unit from just about anything. On a Sonoff you have to cut circuit board traces with a Dremmel tool to isolate the relay.4) Has an exposed female header for flashing with your own custom firmware like Tasmota which fully supports Shelly it in the latest versions. The Sonoff actively discourages this and the company has taken to filling the required holes with solder to try to force everyone to use the Sonoff software. Just the time I use up mucking with the solder and adding a header is worth going with this product instead.5) Can be powered with AC mains (110-230V AC), 12 V DC, or 24-60V DC depending on w

  5. Rob M. (verified owner)

    Uber-Nerd certified. Everything I could ask for in a tiny package; stable network connection, 16A dry contact switching, choice of 12, 24, 48vdc or 120-240vac. But BEST OF ALL is the input terminal that lets you integrate with any wall switch seamlessly or simply sense circuit status.The stock firmware and App are OK, but a little clunky. But they are open source, so the header and config pins are exposed. Just flash them with Tasmota and don’t look back.I’m building a new home this year and will be putting one of these in every switch box. Having trouble convincing your significant other? Tell them when the smoke alarm goes off, all the lights in the house will come on… :)Stop reading reviews and buy these now.

  6. Andrew viersen (verified owner)

    12v operation is a no go unless it’s exactly 12v. The esp inside of both of mine was way out of spec when powered by 12v, causing it to boot loop, over heat, and have sporadic activity. At 12.5, the device refused to function, and was running the chip at over 4v. As it’s a 3.3v chip, basically useless.Do not connect it to a car battery. I was expecting to use it on lights in my travel trailer, but as much as it overheated at 12v I wasn’t comfortable trying.Probably fine for 110/220v, but wasn’t interest in trying given the voltage appears to just be run through a half wave rectifier and a voltage divider. Since my mains voltage is 122, i fear it’d be in the same boat as connecting it to a 12v+ source.Both of my units experienced this issue. Stock firmware. The software loads automatically every time the phone reboots, and opens the app if you want it to or not.

  7. Anonymous (verified owner)

    I almost returned my Shelly 1 units as defective. They are certainly are ‘interesting’ to setup, but I’m now convinced the Shelly units can fit some needs for me. I just wish the Shelly had better documentation or a real WIKI. Trying to do support on Facebook without good search tools means that actual information is very hard to find.There were two attributes that drew me to the Shelly units:12V qualifies as low voltage bypassing safety requirements for 120/240V powered devices.The relay is a dry contact closure that (no voltage) so I can control devices like the garage door.The first struggle was moving the power jumper so they could run from 12V. Use a tiny device like a pin to pry the jumper up most of the way and then use tweezers to grab the jumper. Put it back on the other side of the three jumpers and push it down. This took 10 minutes minimum for me on each Shelly.In multiple tries, I could only see the access point WiFi address for short periods o

  8. Anonymous (verified owner)

    This is exactly what I was looking for. The Shelley 1 is tiny and works exactly as expected. If you own a ring floodlight and it’s hardwired. This is what you need to get it to reset it via wifi, Alexa, or Google assistant. Obviously it works for many other devices as well such as regular lamps, ceiling lights, fans, etc…However, anyone who owns one of these flood lights know that RING never integrated into their software a soft reboot option. So for my setup, I’d actually have to go climb up and reset it via button. Or, go kill the power via electrical box. Sadly, I have my router setup on the same power-line as the this hardwired light. To kill the internet to 80+ wifi devices is a nightmare when it comes to reconnecting.With the Shelly 1, (2x) 3-wire Wago 221 lever nut, and some wire, It makes installing a wifi relay super simple and wiring the floodlight even easier once you up there on the ladder. Just need to lock in the 2 wires from the electrical/power

  9. Jon Brooks (verified owner)

    The hardware is easy to setup and quite compact. The features are exactly what I needed; 120v power input, a relay that controls an unpowered switch, and WiFi connectivity.The product falls flat beginning with the crummy app. The directions to configure the device in the app was incomplete and incorrect. It took quite a while to add the device and it wasn’t intuitive because the process isn’t similar to all the other apps we’re used to. Once I got the app installed, I was excited to add it to Google Home. It gets worse from here.Google Home doesn’t recognize or support the device itself, but rather has a hook into the device cloud, which as we know is terrible. You can’t tell Google to turn something on. Rather, you have to tell Google to connect to the Shelly cloud, and then you’re handed off to the Shelly voice recognition which is worthless. No amount of verbal commands would work despite using the command template provided by the Shelly website. Maybe we’re meant to say the commands in Mandarin?Since my only purpose for the device was to control a fireplace by Google Home, and I can’t do it, and it would be a hassle even if I could, I’m sending the device back.

  10. linux-works (verified owner)

    just flash tasmota to it and use that.move the jumper over to the 12v pos.connect enough male jumper wires to go to all the right slots on the female header. connect ground and the next pin also to ground, to program. I used “esptool.py -p /dev/ttyUSB0 write_flash -fs 1MB -fm dout 0x0 ./tasmota-lite.bin” from linux. make sure your USB serial dongle is 3.3v!! not only the levels being 3.3v but the output vcc being 3.3v, since that powers the shelly1. leave the 12v OFF during programming. don’t even think of connecting 120vac!!run esptool and when it completes, remove the usb serial dongle. remove all cables from the shelly1. NOW connect 12v dc to the unit (or 120vac, but I prefer low voltage and I moved the jumper over to the 12v slot). when you give it power, look for the tasmota ssid in your ssid phone app. connect in, go to 192.168.4.1 and do a wifi scan via the button or link. add your access point user and pass. type it carefully 😉 submit that form and when shelly1 reboots, look for its new ip addr on your ‘router’ or whatever does dhcp over wifi for you.once you can get in, you can then do regular firmware OTA and fetch the latest from the mothership.its great. tasmota is great. be sure to config for this (set the gpio pins to the relay and button, search for tasmota and shelly1 and you’ll find the module config you need to use). its all via the web gui once tasmota is basically loaded the first time.

Add a review

Your email address will not be published. Required fields are marked *